Tabla de contenido
Today we wanted to extend this article on how to create a software RAID on linux with mdadm. We start with the theory.
What is a RAID?
We can define a disk raid as a group or array of independent disks, in fact RAID is an acronym for Redundant Array of Independent Disks. The disks are unified by software or hardware to redundant data and/or use the full capacity of each disk as a whole. This will be easier to understand when we define each type of RAID later.
Difference between hardware RAID and software RAID
- What is Software RAID?
Software RAID is, as the name says, an application that allows the creation of RAIDs at a logical level from disks connected to our computer. This software creates a file system in which it works behaving according to the type of RAID configured.
- What is Hardware RAID?A hardware raid is a physical device that allows the creation of a RAID of disks. It can be a PCI or PCIE expansion card or it can be integrated in the motherboard, this hardware integrates everything necessary to perform a RAID without using the processor or the system’s RAM (as a general rule), it can also integrate a cache. This cache can speed up read/write operations.
What are their main differences and the advantages of each one?
- Hardware RAID requires hardware which carries a cost.
- With hardware RAID, in case of disk failure, we only need to insert the new disk and the RAID is usually rebuilt without any additional steps (as a general rule).
- Software RAID avoids the point of failure of a single RAID card. If this card fails the RAID will not work.
- In today’s systems the difference in performance compared to hardware RAID is less noticeable as processors are more powerful.
- Hardware RAID does not use resources of the host machine’s processor.
Most used RAID levels
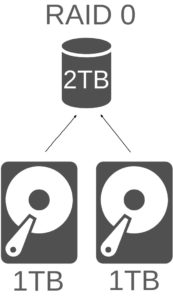
· RAID 0 (Data Striping, Striped Volume)
This raid takes the capacity of the added disks and adds them together. For example if we have 2 disks of 1TB with this RAID we will get a volume of 2TB. If the disks are of different capacities, it always takes the lowest one to use, as well as the RPM (revolutions per minute) of the disk. That is to say, if we have a 2TB disk at 7200RPM and another of 1TB at 5400RPM we will have a volume of 2TB at 5400RPM, that is to say, we return to have a volume of 2TB but slower. That is why it is important that the disks are similar.
On the other hand, in this type of RAIDs performance is a priority but not security, there is no data redundancy so if a disk breaks the volume will be corrupted.
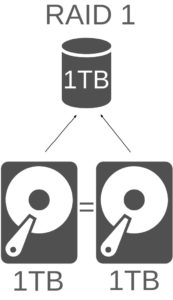
· RAID 1 (mirror)
This RAID as in the previous RAID and in all the RAID, the disks must have the same capacity to avoid wasting disks. In this RAID mode the two disks are configured in mirror, this means that the entire contents of the disk is replicated on another disk for every 2 disks 1 disk is dedicated to redundant data. It is recommended for 2 disks. This RAID has an added advantage and they are greater speed of reading multiuser since data of the two disks can be read. However writes are slower as they have to be done on both disks.
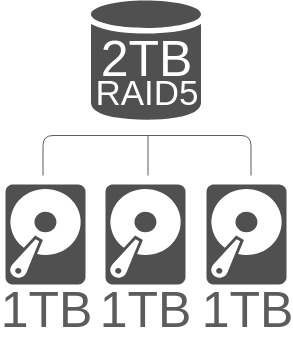
· RAID 5
This RAID is the most popular due to its low cost. With 3 disks approximately 75% of the disk capacity is available. It requires only a minimum of 3 disks and supports the complete loss of one disk. The information is served in blocks distributed by the total of the disks so the more disks the more performance also influences the size of the disks the bigger they are the more time it takes to rebuild the RAID in case of failure of a disk. This RAID protects against failures by distributing the parity calculation over all the disks and thus protecting against possible hardware errors.
The weakness of this type of RAID is that if a disk fails, until it is replaced the volume is unprotected against failure of another disk. This is where Spare disks come in. A spare disk is a reserve disk that enters “to be part of the game” when one of the disks fails, this way the number of disks that can fail is two (as long as the RAID is not in reconstruction process when the second disk fails) This way we avoid the failure point mentioned before. When the spare disk is added, this type of RAID is also known as RAID 5E. There are two types of spare: “standby spare” and “hot spare”.
If it is a standby spare it involves a rebuilding process during the addition of the spare disk replacing the failed disk, however if it is a hot spare this time is minimized.
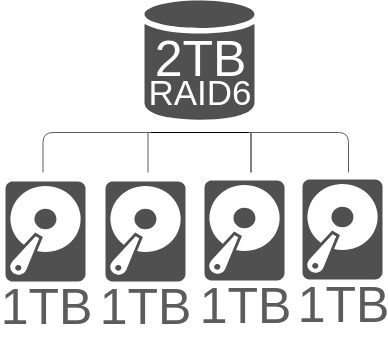
· RAID 6
Let’s say it is the evolution of RAID 5, it needs at least 4 disks. It works like RAID 5 but with double parity stripe which is also spread over all disks. This type of RAID supports the total failure of up to two disks even during the RAID rebuild. It is less used because when few disks are used the capacity of two disks is wasted because they do not reach the theoretical maximum, with 4 disks the RAID will have about half the capacity of the disks. The more disks used in the RAID, the more capacity of each disk is used.
As in RAID 5, in RAID 6 spare disks can be added (usually called RAID 6E) to support a third failed disk (the latter can fail without corrupting the volume as long as the raid is not being rebuilt).
Nested RAID levels
Nested RAID levels is “RAID on RAID”. That is a RAID of one type mounted on RAID(s) of another type. This way you can take advantage of the benefits of each RAID. For example:
- RAID 0+1 : It is a mirror of RAIDs 0, that is to say if we have 4 disks, 2 raids 0 are created with each pair of disks and with the 2 RAID volumes created a raid 1 is created. In this way we add redundancy to RAID 0.
- RAID 1+0: It is a RAID 0 of two mirrors (RAID 1). Two RAID 1 are created with each pair of disks and with the pair of RAID 1 created, a RAID 0 is created.
- RAID 50 (5+0): For this RAID a minimum of 6 disks are required. With each trio of disks a RAID 5 is created. Then with each RAID created a RAID 0 is created with the RAID 5 created. With 6 disks a total of approximately 65% of the disk capacity is reached.
The most common RAID types are:
- RAID 0: For storage of non-critical data of which loss is not important.
- RAID 1: For operating systems, e.g. on servers. The operating system is usually installed on a RAID 1.
- RAID 5: Storage in general because of its low cost and good reliability.
How to mount in linux each type of RAID with “mdadm”:
A raid in linux is very easy to configure using the steps we are going to describe:
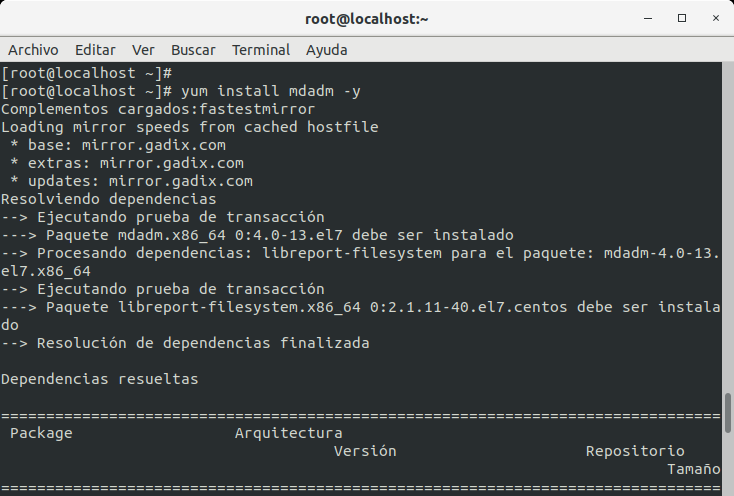
Step 1: Install mdadm: by default it is not usually installed on Linux.
In debian and derivatives:
apt-get install mdadm
On RedHat / CentOS and derivatives:
yum install mdadm
Step2: The disks to be included in the RAID must be filled with zeros to avoid problems with existing file systems:
root@localhost:~# mdadm --zero-superblock /dev/hdb /dev/hdc
(And so many other disks to use) or with DD:
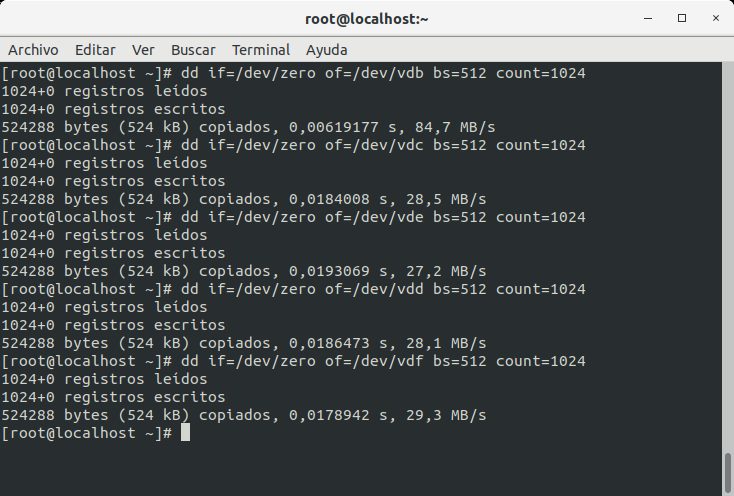
Step 3: The next thing would be to create the RAID, basically it would be with:
mdadm -C /dev/NOMBRERAID --level=raid[NUMERO] --raid-devices=NUMERO_DE_DISCOS /dev/DISCO1 /dev/DISCO2
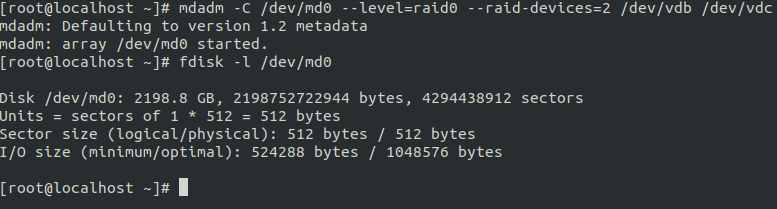
- RAID 0: A minimum of two disks are selected (e.g. vdc and vdd):
mdadm -C /dev/md0 --level=raid0 --raid-devices=2 /dev/vdc /dev/vdd

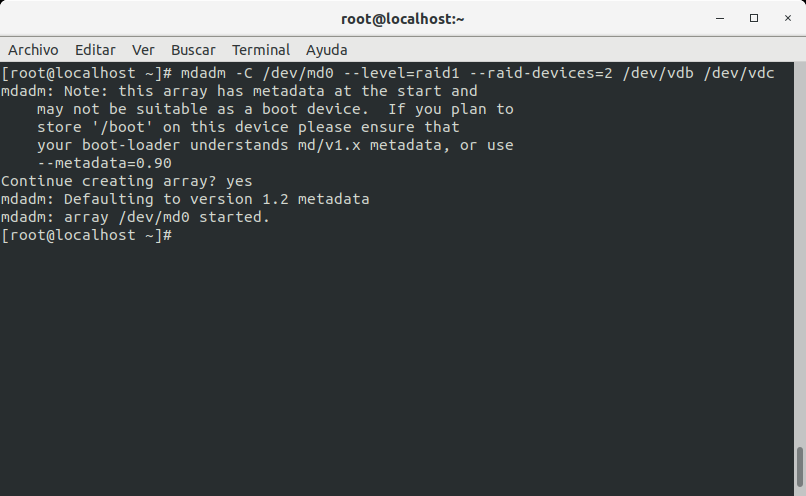
- RAID 1: In the case of RAID 1 it is best to select a maximum of 2 disks / volumes (we use vdc and vdd as examples):
mdadm -C /dev/md0 --level=raid1 --raid-devices=2 /dev/vdc /dev/vdd
- RAID 5: At least three disks:
mdadm -C /dev/md0 --level=raid5 --raid-devices=3 /dev/vdb /dev/vdc /dev/vdd
If we want a spare disk (we have to add all the disks including the spare to the RAID from the beginning):
mdadm -C /dev/md0 --level=raid5 --raid-devices=3 --spare-devices=1 /dev/vdb /dev/vdc /dev/vdd /dev/vde
- RAID 6: At least 4 disks
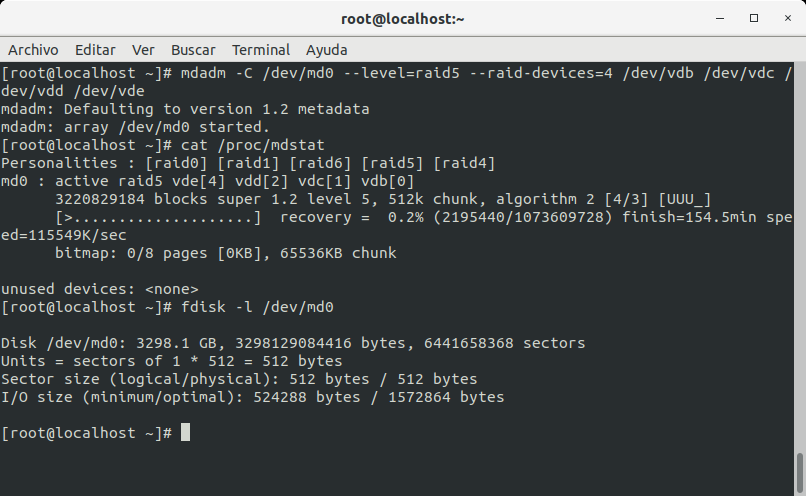
mdadm -C /dev/md0 --level=raid5 --raid-devices=4 /dev/vdb /dev/vdc /dev/vdd /dev/vde
And with spare parts:
mdadm -C /dev/md0 --level=raid5 --raid-devices=4 --spare-devices=1 /dev/vdb /dev/vdc /dev/vdd /dev/vde /dev/vdf
In case of failure of a disk of a RAID we only must extract it and insert the new disk and when we introduce the new disk (looking at the system log of /var/log/messages) we execute:
mdadm --add /dev/RAID /dev/NUEVO_DISCO
In case you want to stop a RAID:
mdadm --stop /dev/md0 && mdadm --remove /dev/md0
Y para consultar el estado:
cat /proc/mdstat
And this has been all about how to create a software RAID in linux with mdadm.
If you liked the article leave a comment and/or share on your social networks.
See you soon!